01Overview

Billiard Ball Rendering Without a Mesh using Math
Over the weekend I made a simple billiards game, and like usual, I got distracted by trying to do something completely unnecessary :)
Over the weekend I made a simple billiards game, and like usual, I got distracted by trying to do something completely unnecessary :)
The fundamental idea is to generate a sphere within the fragment shader, starting from a simple 2D quad. By manipulating UV coordinates and applying careful math, we can create the illusion of a 3D ball, complete with texture mapping, lighting, and shadowing.
A key aspect of this technique lies in its unconventional use of UV coordinates. Typically associated with mesh vertices, UV coordinates in this context take on a different role.
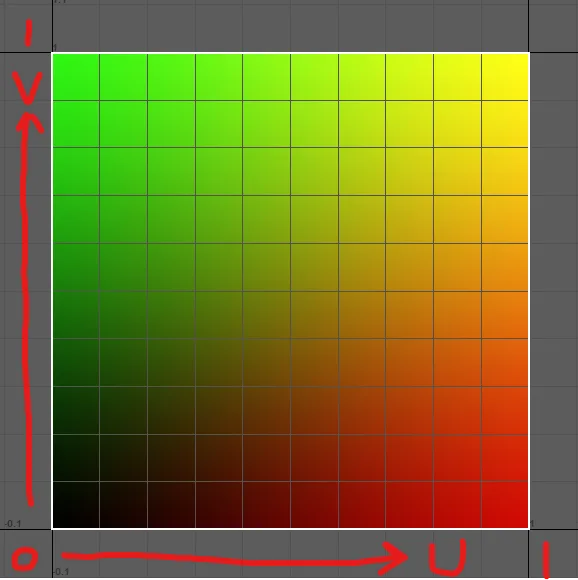
UV coordinates aren't strictly bound to mesh geometry. In fact, they can be used to sample a texture in various ways. Consider a standard quad with a texture where the red channel represents the U coordinate (0-1) and the green channel represents the V coordinate (0-1).
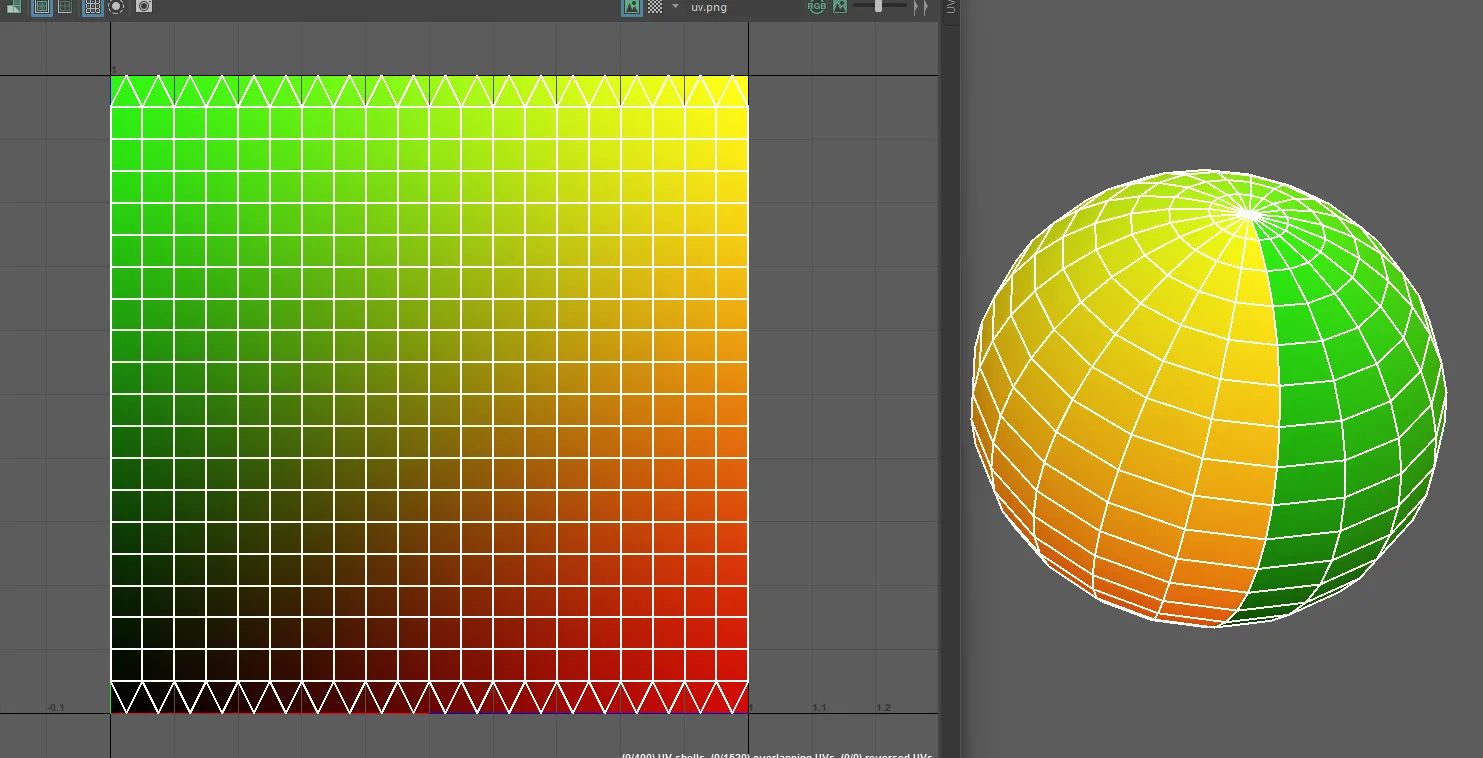
If we map UV's onto a sphere in an equirectangular fashion, we can put an image on a sphere quite easlily.
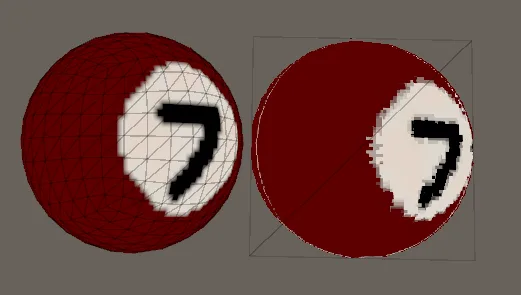
Interestingly, we could use an image of a sphere's UV mapping as texture coordinates for a 2D sprite, approximating the effect of texture sampling on a 3D sphere. This approach is akin to pre-rasterization, offering a conceptual bridge between 2D and 3D rendering.
However, this method has limitations. Using a static image can introduce artifacts, especially if the image resolution is low. Additionally, manipulating UVs would require sprite atlasing, which is inefficient for a simple sphere.
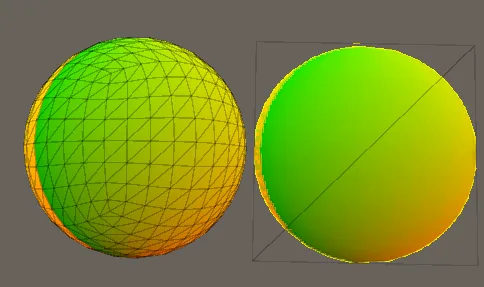
left: texture directly on a sphere | right: using texture on a sprite as tex-coords
Our shader takes this concept further by generating the sphere and its UVs mathematically. This approach offers several advantages:
1. Eliminates artifacts associated with image-based UV mapping
2. Allows for dynamic UV manipulation without the need for sprite atlasing
3. Enables the integration of lighting calculations directly in the shader
vec2 sphereUV = (uv * 2.0 - 1.0) * scale;
float x = sphereUV.x;
float y = sphereUV.y;
float z2 = 1.0 - min(1.0, dot(sphereUV, sphereUV));
float z = sqrt(z2);
vec3 spherePoint = vec3(x, y, z);
vec2 sphereUV = (uv * 2.0 - 1.0) * scale;
- uv: Input UV coordinates, typically ranging from (0,0) to (1,1).
- uv * 2.0 - 1.0: This transforms the UV range from [0,1] to [-1,1].
- Multiplying by 2 scales it to [0,2]
- Subtracting 1 shifts it to [-1,1]
- scale: A uniform scaling factor applied to adjust the size of the projected sphere.
This step centers our coordinate system at (0,0) and extends it to cover a 2x2 square, which will be the basis for our sphere projection.
float x = sphereUV.x;
float y = sphereUV.y;
The x and y components of our 3D point are directly taken from the transformed UV coordinates. This creates a flat projection of our sphere.
float z2 = 1.0 - min(1.0, dot(sphereUV, sphereUV));
float z = sqrt(z2);
This is where the magic happens - we're calculating the z-coordinate to turn our flat projection into a sphere.
- dot(sphereUV, sphereUV): This calculates the squared distance from the center (0,0) to our current point on the 2D plane. It's equivalent to x^2 + y^2.
- min(1.0, dot(sphereUV, sphereUV)): This ensures our result never exceeds 1. It's crucial for points outside the unit circle on our 2D plane.
- 1.0 - ...: This inverts our value. As we move away from the center, this value decreases.
- sqrt(z2): We take the square root to get the actual z value.
This calculation is derived from the equation of a unit sphere: x^2 + y^2 + z^2 = 1
We're essentially solving for z: z = √(1 - x^2 - y^2)
vec3 spherePoint = vec3(x, y, z);
Finally, we combine our x, y, and calculated z into a 3D vector representing a point on the surface of our sphere.
To allow dynamic orientation of the ball, we apply a 3D rotation:
mat3 rotation = rotateXYZ(iRotation);
vec3 rotatedSpherePoint = rotation * spherePoint;

mat3 rotateXYZ(vec3 angle) {
    vec3 c = cos(angle);
    vec3 s = sin(angle);

    mat3 rotX = mat3(1, 0, 0, 0, c.x, -s.x, 0, s.x, c.x);
    mat3 rotY = mat3(c.y, 0, s.y, 0, 1, 0, -s.y, 0, c.y);
    mat3 rotZ = mat3(c.z, -s.z, 0, s.z, c.z, 0, 0, 0, 1);

    return rotZ * rotY * rotX;
}
The rotateXYZ function generates a rotation matrix from Euler angles, enabling rotation around any axis.
The shader maps a 2D texture onto the sphere using spherical coordinates:
vec2 finalUV = vec2(
    atan(rotatedSpherePoint.z, rotatedSpherePoint.x) / (2.0 * PI) + 0.5,
    asin(rotatedSpherePoint.y) / PI + 0.5
);
finalUV.x = 1.0 - abs(mod(finalUV.x * 2, 2.0) - 1.0);
This is the part that wraps the texture around the sphere. I'm using mod to have the texture show up on the other side of the ball in the correct orientation, otherwise it would have been mirrored (which is bad for billiards lol)
This process maps every point within a 2D circle to a point on the surface of a 3D sphere. Points outside this circle will be clamped to the edge of the sphere, creating a complete spherical surface.
A basic Phong lighting model is implemented to enhance the 3D appearance:
float diffuse = max(dot(normal, lightDir), 0.0);
float specular = pow(max(dot(viewDir, reflectDir), 0.0), 32.0);
vec3 litColor = texColor.rgb * (diffuse + ambient) + vec3(0.5) * specular;
A simple soft shadow is added to further the 3D illusion:
vec2 shadowOffset = vec2(-lightDir.x, -lightDir.y) * 0.05;
vec2 shadowUV = uv - vec2(0.5) - shadowOffset;
float shadowDistance = length(shadowUV) * 2.2;
float shadow = 1.0 - smoothstep(1.0 - shadowSoftness, 1.0, shadowDistance);
Check out the project on my GitHub! https://github.com/parodyband/odin-billiards (https://github.com/parodyband/odin-billiards)